A while ago, PapaXpress asked me if it is possible to use a train to autonomously test stretches of track and if I could help him to make this work on his CC route. I answered with a double YES. I have written a two part tutorial to show everybody how this works.
Please make sure that you already know the basics of scenario creation in order to understand everything. You can find my basic tutorials here.
Let's get started.
We want to run a train autonomously over a stretch of track. A Free Roam Scenario is the best way to make this work. Create one using the Scenario Editor function in the Main Menu.
(make sure that the scenario's start point is also the start point of the piece of track you want to test)
Assemble a consist with loco on the track you want to test.

2 - Add it to the lead loco by clicking on it.

4 - The Train Properties will open as a flyout on the right side of your screen. You can change the name of your test train here. Leave all the other options unchanged.

5 - Go into the Timetable View. At first, the train needs a Final Destination Instruction. Add it to the list.
6 - Now select your desired Final Destination from the drop down marker list in the appearing window. It should be at the end of the line you want to test.
7 - Make sure that the Allow Reversing Box is unchecked. Close the window.
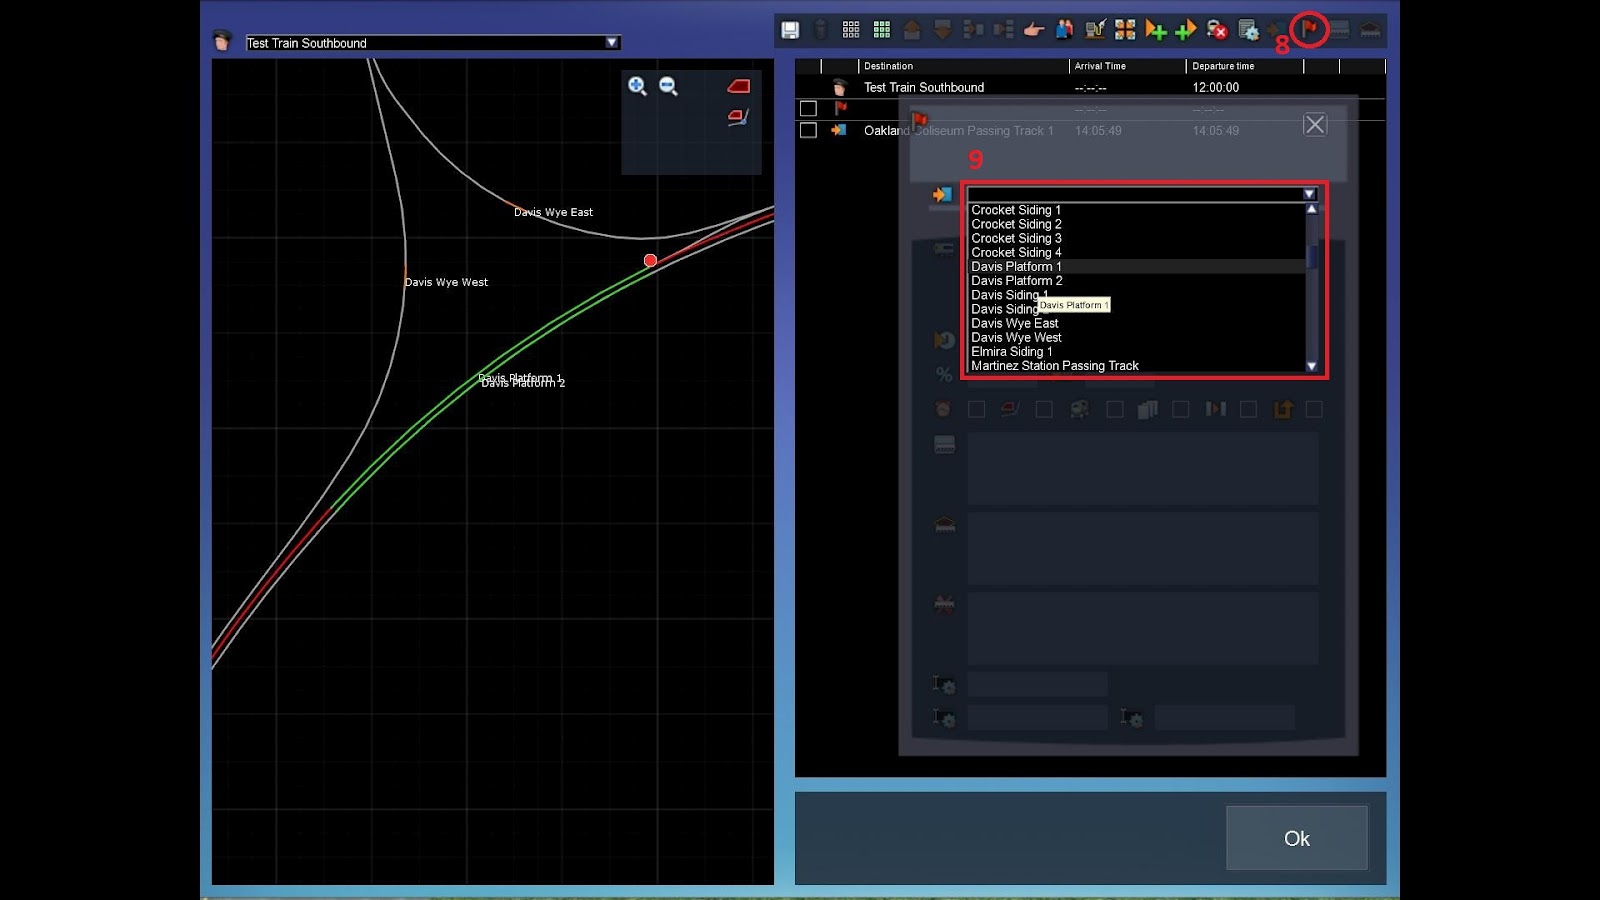
9 - Again, select your desired marker. Close the window.
The more of such Waypoints you add, the smaller is the risk of the train leaving the desired path.
What happens if the train path leaves the line you want to test, although the waypoints are selected correctly? What are the next steps? See it in Part 2 of this tutorial.
No comments:
Post a Comment